Progress Bar Configuration
The following configurations apply for the following Progress Bars
Time
Status Category
Completed Issues
Numerical
Story Points
Custom
Calculated
The data input configuration
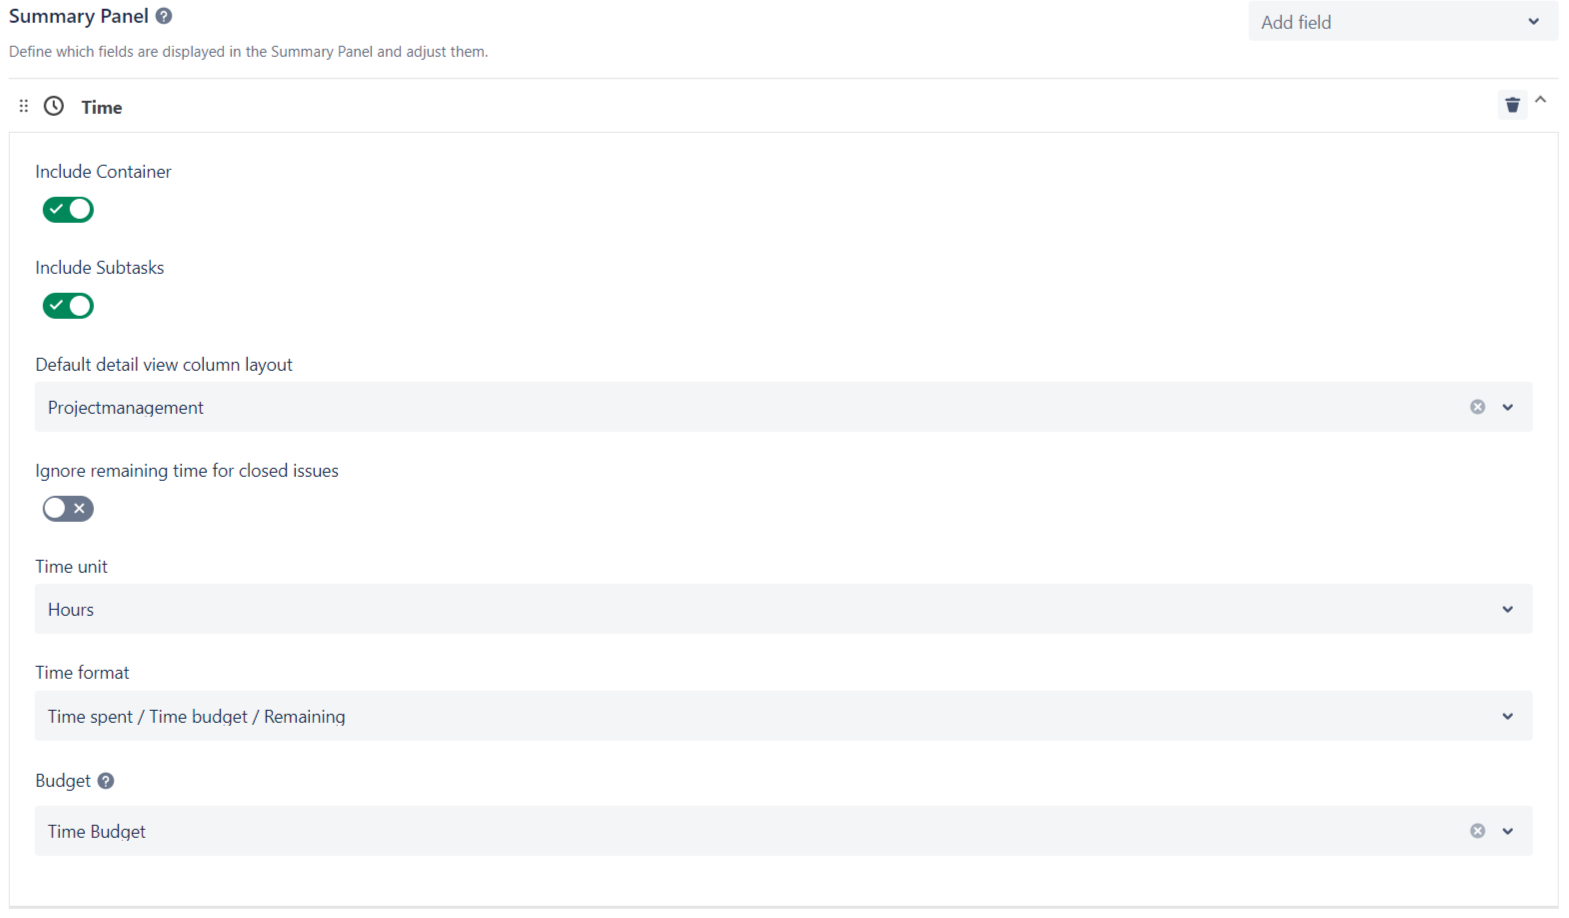
By changing the data input for each progress bar, you can customise which data is displayed on the progress bars. Epics and sub-tasks can be toggled “on” or “off”, from the progress bar settings.
You will see two of the following options to configure
Include epics configuration
Include sub-task configuration
Learn more about each option below.

Include Epics Configuration
When the “include epics” configuration is toggled “on” Epic Sum Up will calculate all of the issues within an epic.
If this configuration is deactivated the top level epic will be excluded from progress bar calculations.
Include Subtask Configuration
When the “include sub-tasks” configuration is toggled “on” Epic Sum Up will include all sub-tasks within epics in the calculation. If this configuration is deactivated all related sub-tasks will be excluded from progress bar calculations. Please note that from the calculation excluded sub-tasks won’t be shown in the Detail View Editor.
Please note that the default setting for data samples includes epics and sub-tasks.
Default Detail View Editor Column Layout

The default Detail View Editor column layout provides you with the ability to customise the view that you see first. You can choose from all the global layouts you have set.
The Detail View Editor is the visualisation presented when you click on the progress bar, which is where you estimate times e.g. You can choose from a plethora of different fields and values to create global templates to make things easier for your team to configure progress bars.
Learn more about Detail View Editor layouts here.
Budget Marker Configuration
The budget configuration on progress bars activates a black indicator that will appear on your progress bar. The budget indicator will map how much budget you have spent, in comparison to the total budget estimated.

Budget Configuration is possible for the following progress bars:
Time
Numerical
Story Points
Custom
Calculated
To add a budget marker to a progress bar you need to create a custom field first. Learn more here.
Configurations for the Time Progress Bar
Please note that the following configurations are only applicable to time progress bars

Formatting time values under the time progress bar
There are six options for formatting time progress bars:
Time Spent / Estimated
x% (Time Spent / Original Estimate)
Time Spent / Total / Remaining
Time Spent / Estimated / Remaining
Time Spent / Time Budget / Remaining
x% (Time Spent / Time Budget)
Time spent is a summary of the total logged time
Remaining time is a summary of time estimated, minus the time spent.
Estimated is a summary of estimated time
Time budget is a summary of the time budget set.
Total is a summary of the time spent and remaining time.
Ignore remaining time configuration
We recommend switching on the ignore remain time configuration to ensure the accuracy of the time remaining on time progress bars. When toggled on Epic Sum Up automatically ignores remaining time associated with closed issues.
Please note that this is switched off by default.
To change this configuration, click on the time progress bar, in the Summary Panel and toggle on the “Ignore remaining time for closed issues” configuration.
Calculated Progress Bar Configuration
Simply select two custom field values with an operator to perform the calculation required for the progress bar.

Epic Sum Up supports all Jira custom fields plus fields from other tools such as Jira Workflow Toolbox (JWT).
Four Operators are available in Epic Sum Up including
Multiply (*)
Addition (+)
Minus (-)
Divide (/)
The two values on either side of the operator can be selected from any pre-configured field.
There is also the option to select a custom value. When a custom value is selected users can add any static number into the calculation.
Custom value based calculations are useful for building progress bars which e.g. visualise the personnel cost progress. In this case, the custom value is equal to the personnel hourly rate.
As a result, you’ll never lose track of your project spend.
