Time Sheet
What is the Epic Sum Up Time Sheet?
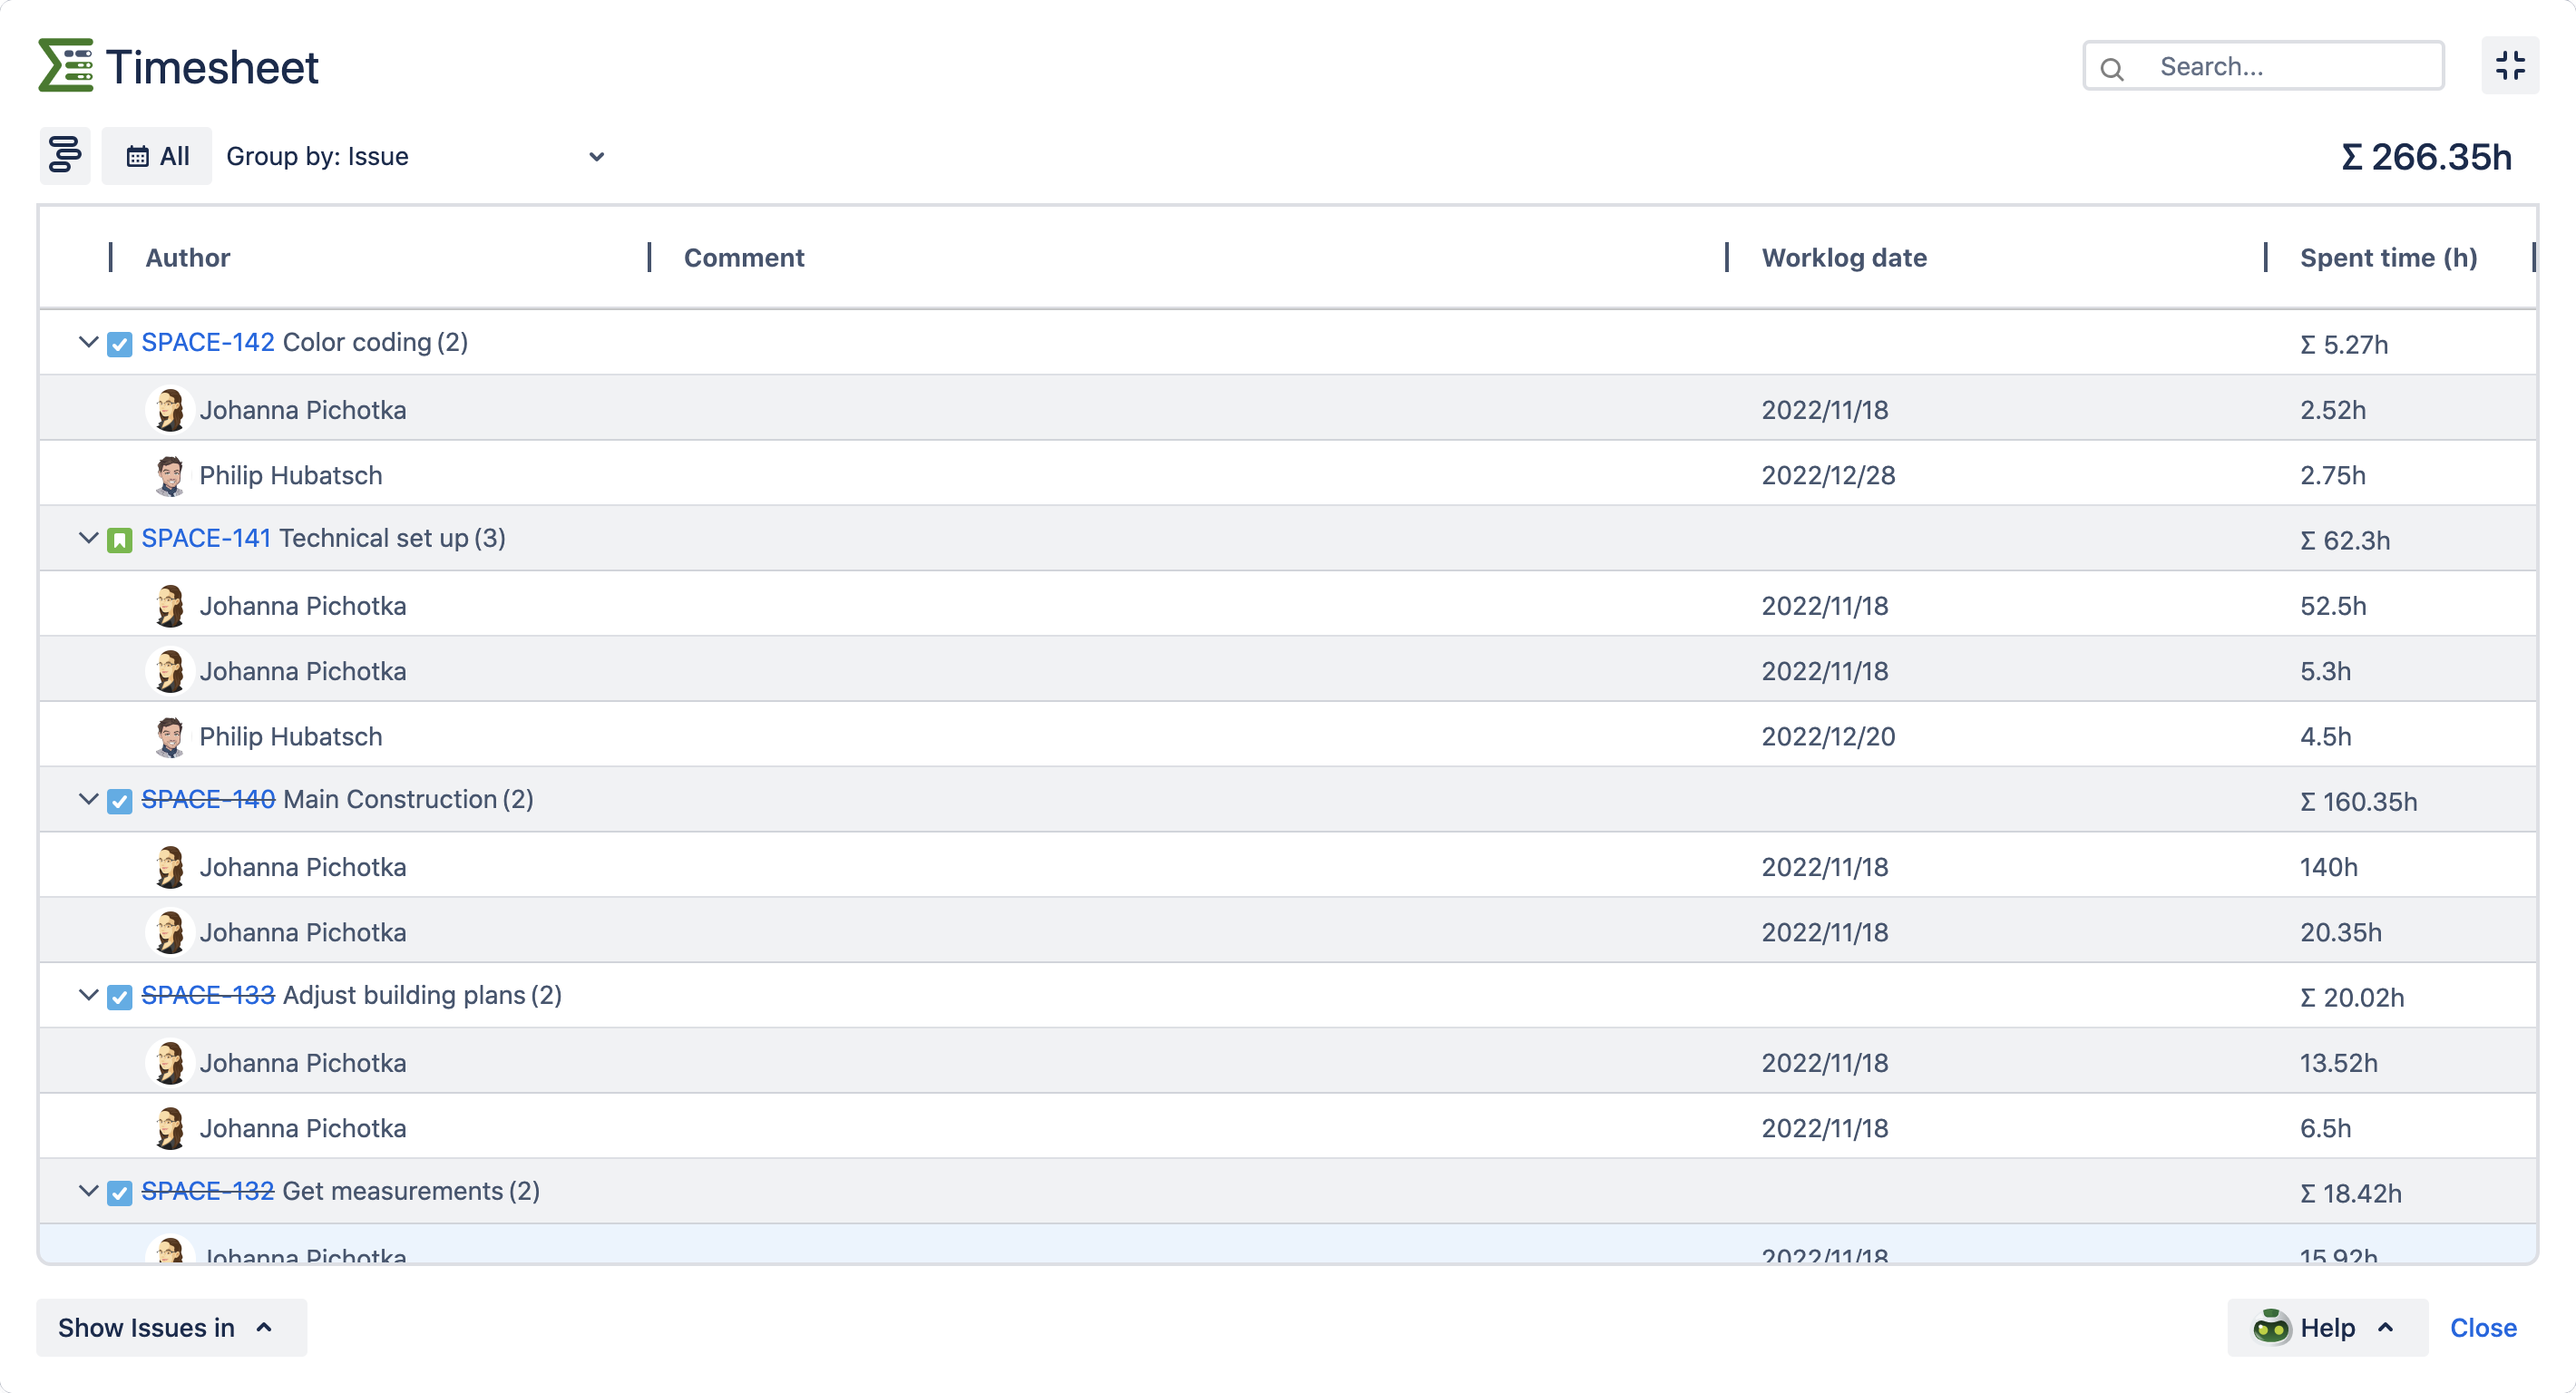
The Time Sheet is a useful feature that Epic Sum Up offers. With Epic Sum Up, you can quickly and easily generate Time Sheets that will show you how long each team member spent on each issue.

What is the Value of the Time Sheet?
Once you create a Time Sheet, Epic Sum Up allows you to create a worklog report.
This report will be very useful for managers to assess the performance of individual team members, with different sorting and grouping options, to give you the best view of the data. This data is also useful in assessing how your project is going overall.
Example Use Cases
If you are a project manager, you may wish to structure your worklog report in specific ways. For example, if you want to view the worklogs of only the software developers on your team, you could select to view the data for those individuals.
How to access the Epic Sum Up Time Sheet
From the Detail View Editor use the “Show Issues In” button, in the bottom left corner.
Click the “Show Issues In” button at the bottom of the Summary Panel.
Time Sheet Features
Quickly view worklogs - view your worklogs in an issue hierarchy, in one view, without having to filter
Group your worklogs - by default, worklogs are grouped by issue. However, they can also be grouped by author or date.
Select a specific date-range - create your worklog reports from a calendar. Alternatively, you can use one of the preset options, such as the last month, which are available.
Search for specific data - in the Search Bar
Filter for specific individuals - look up individuals on your team, to view their worklog data
Time aggregation - View a summary of all times, filter as needed
Export data - to CSV and Excel
How to create a worklog report
1.Open Time Sheet
Within Epic Sum Up, go to the Summary Panel on the right hand side of the screen. At the bottom of the Summary Panel, click on the share icon and choose Time Sheet from the menu to open it up.
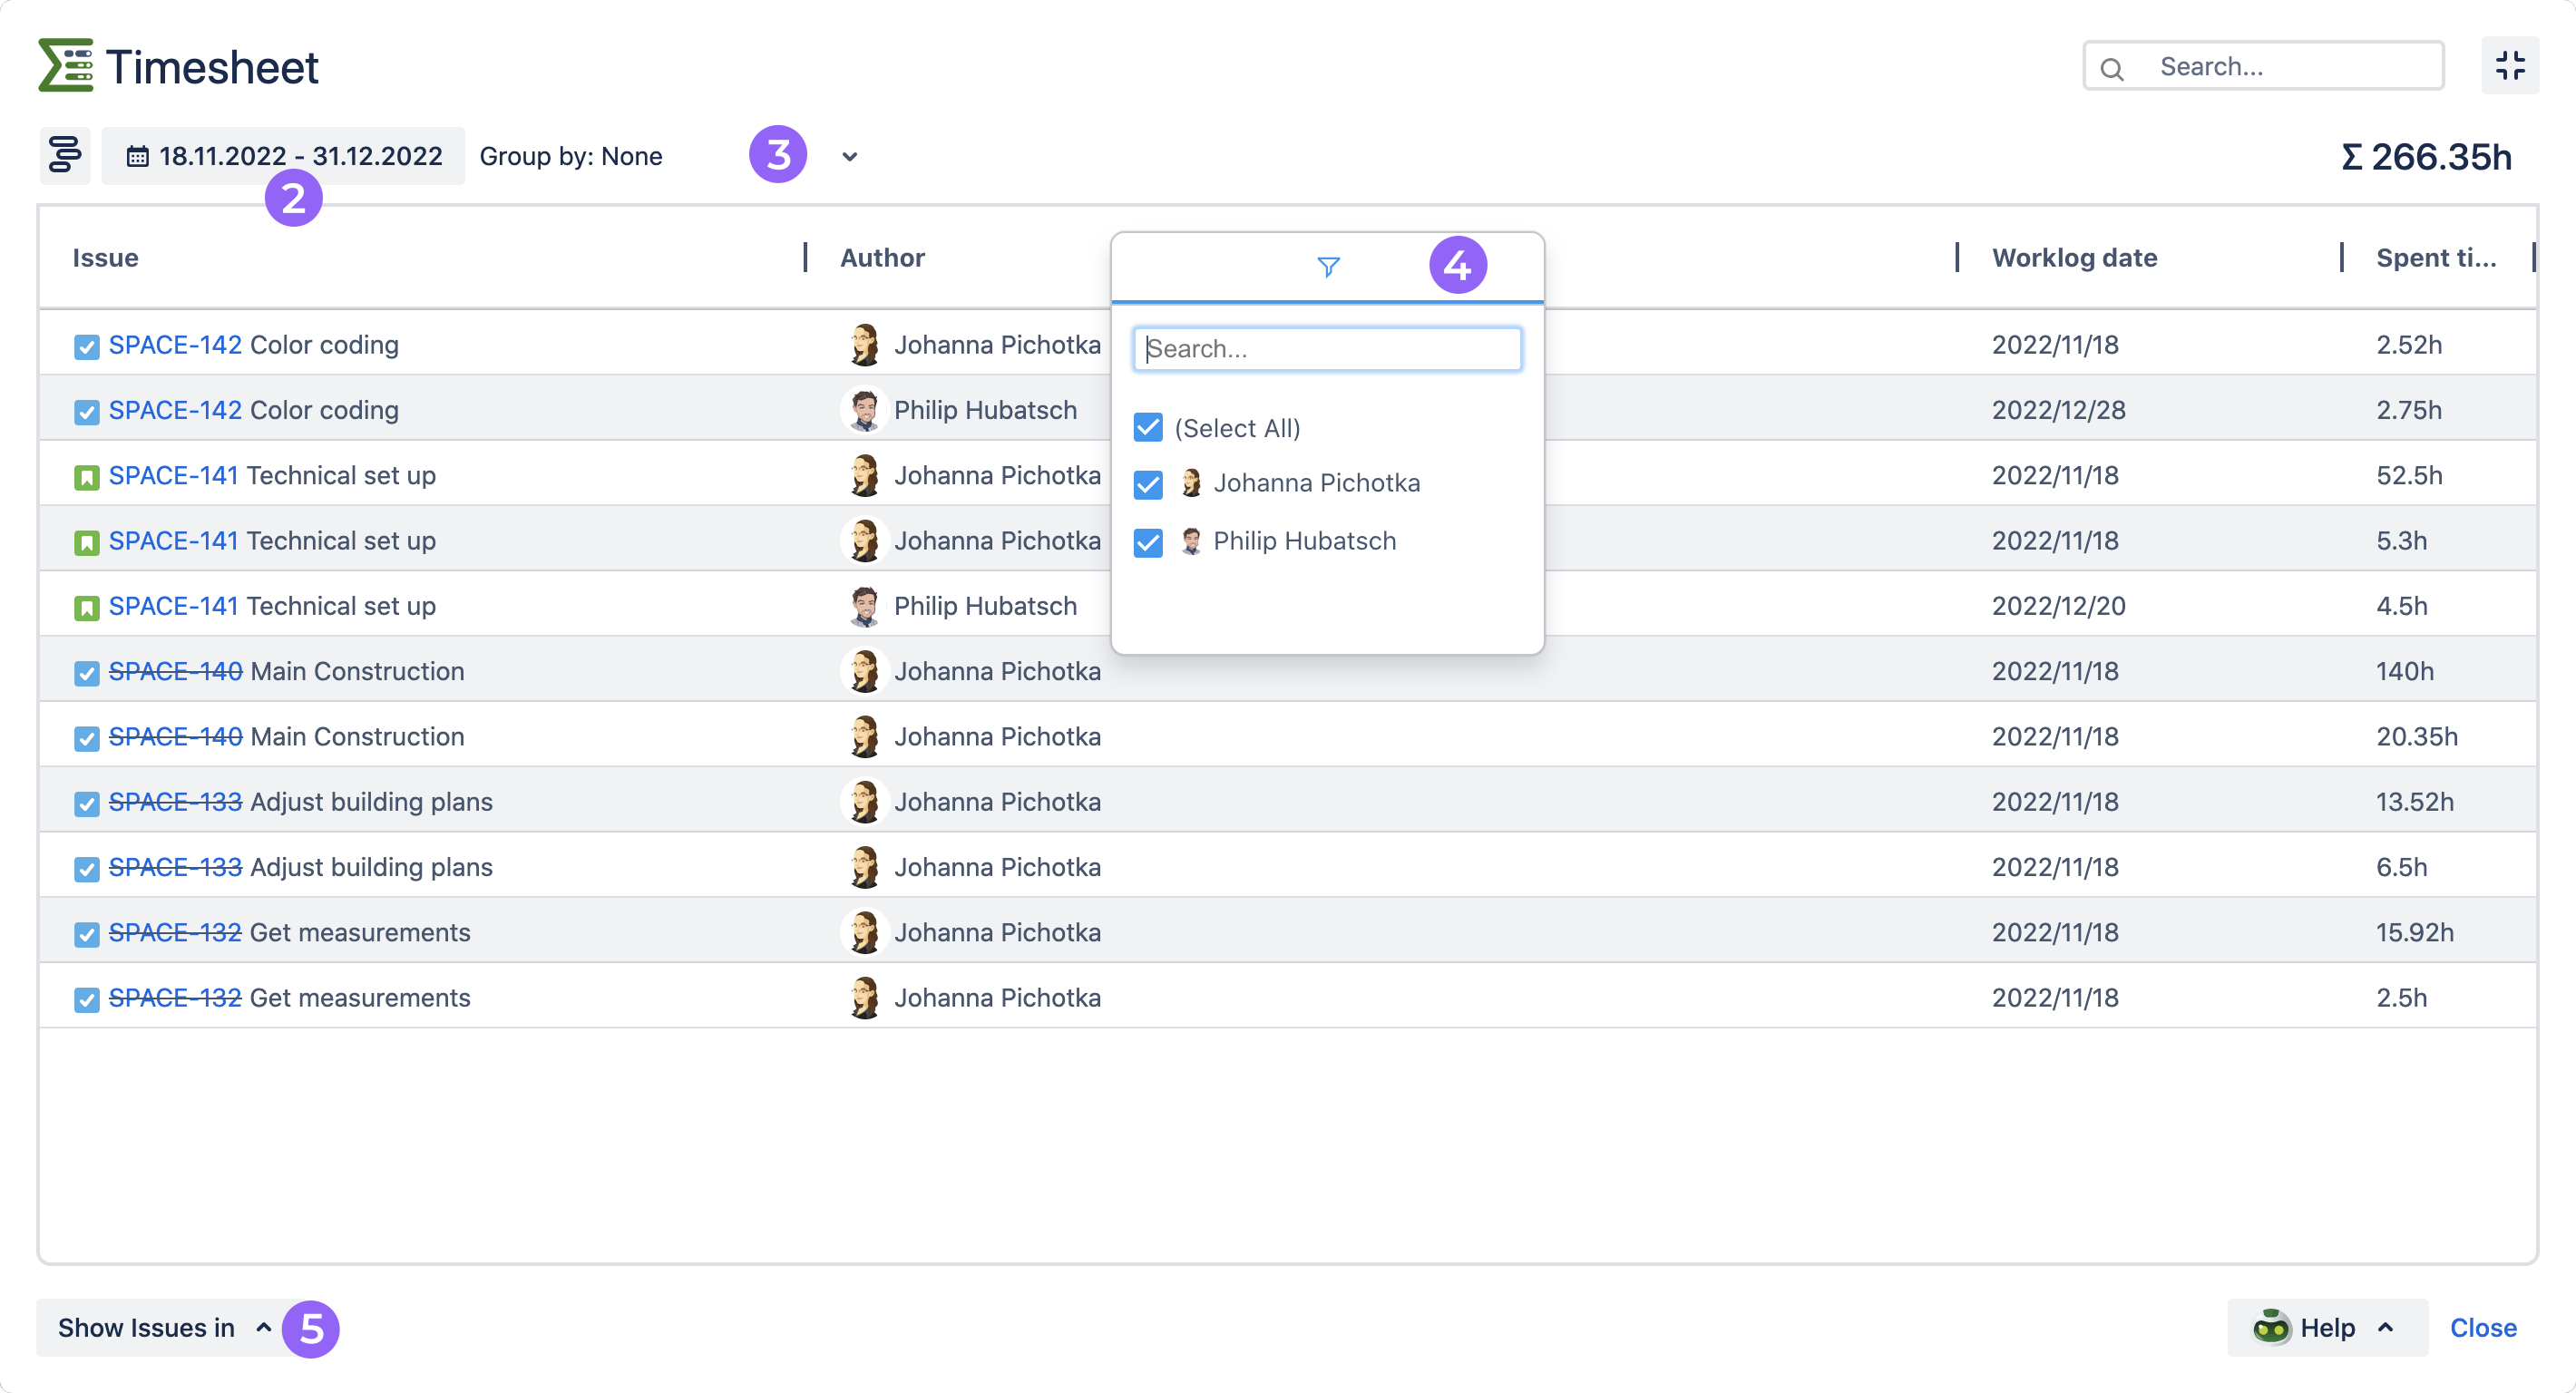
2.Select the date-range of your sheet
After you have opened the Time Sheet in Epic Sum Up, navigate to the calendar All icon. Clicking on this icon will open up a calendar view, from which you can select the date-range of your choice. Alternatively you can select one of the available Presets.

3.Filter your worklogs to display the information that you wish to report on.
In the upper left portion of the screen in your worklog report, you will see a Group By dropdown menu. Click on this, and you will see a menu of options which include: Issue, Author, and Worklog Date.
4.Sort and filter the report using worklog columns of your choice
You also have the option to sort and filter worklog report data using columns. These columns include: Issue, Author, Comment, Working date, and Spent Time (h).
Within the filter menu for e.g. the Author you can select, or deselect certain team members - this is useful if you want to sort your worklog report to only include specific roles within your team. In order for this menu to appear on the column header, you need to set the grouping option to Group by: None.
Now you have all the information you need for your report.
5.Export your report
To export your report data, navigate to the bottom left corner of your Time Sheet. You will see a Show Issues In menu button. Click on the button, and a drop down menu will appear - here you will see options to export your report to Excel or CSV format.
