Global configuration
Keep in mind that the global settings are only available for Jira admins so if you’re a user and want to customize the Epic Sum Up global settings, please refer to your Jira admin.
General settings
Activate this toggle to allow users to log time in the Detail View Editor, when double clicking on the time spent cell.

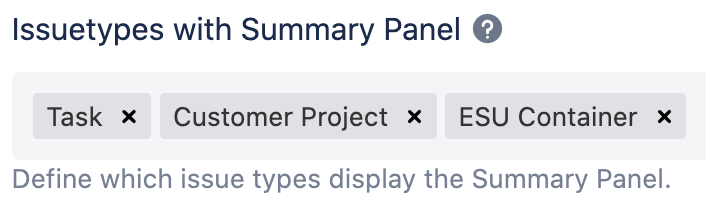
Before you can start configuring the Summary Panel, please ensure all issue types you wish to configure are added to the “Issue types with Summary Panel”
Summary Panel
Please note that each level of configuration will override the previous ones.
The hierarchy of the Summary Panel configuration is as follows:
Summary Panel global settings
Summary Panel global settings per issue type(s)
Now that you understand how all the configurations on Epic Sum Up work, you can begin customizing your Epic Sum Up Summary Panels to the needs of your business.
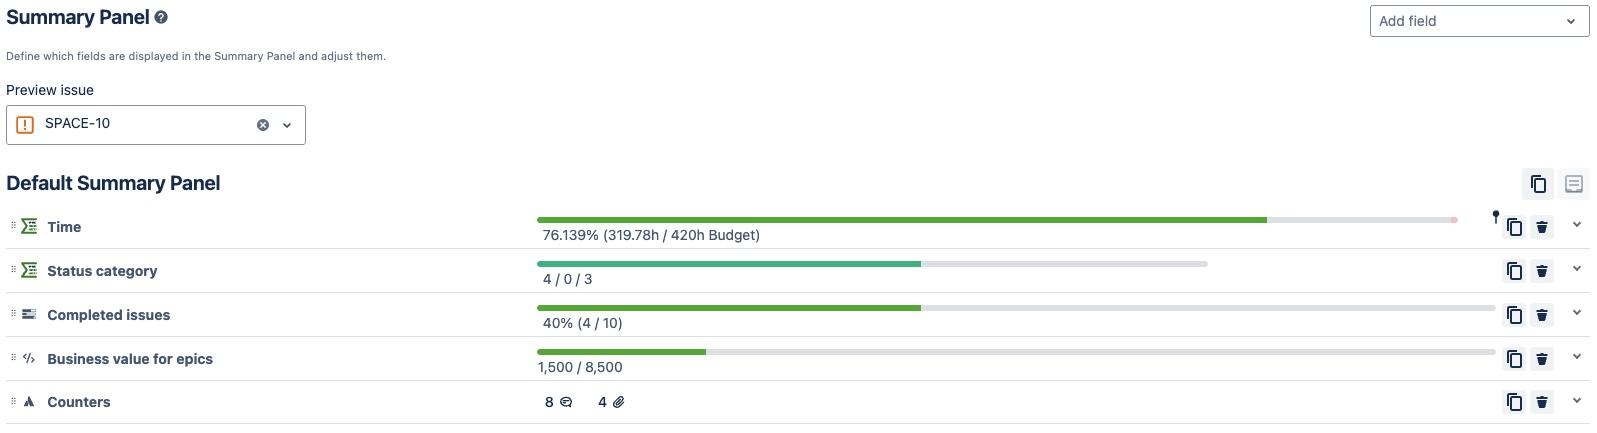
1. Global settings
Admins can configure the Summary Panel to show different metrics, depending on the company requirements and preferences. Once this is configured, it will be used as your standard configuration for Summary Panels. You can also customize the Summary Panel configuration on a local project basis, which you can learn more about here.
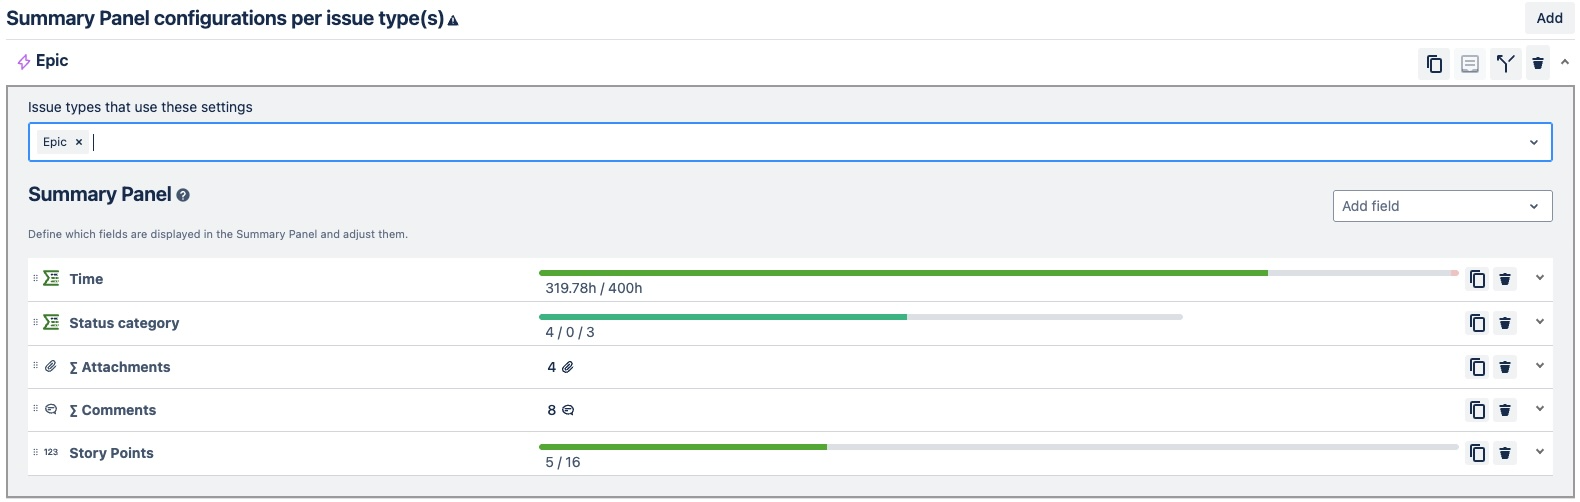
2. Global Settings per issue type(s)
Provided that you have added all the issue types to the general settings you can customize the Summary Panel global settings for each issue type, individually.
There are no limitations to how many Summary Panels can be configured. Admins can select the issue types to display to the Summary Panels.
All configurations at this level will override the global Summary Panel configuration.
For configuration options of progress bars, you can have a look at this page.
Containers
1.Choose which container link type to use
Select the type of container link you want to be used in your instance. You have the option to choose between the container link custom field which works like the Jira Parent field or regular issue links.
2.Define work item types as containers
Define which work item types can be used as containers. Only the work item types set here can become a container parent to other issues or containers.
Depending on which method you chose in step one, follow this guide for setting up the container link field or skip this step onto the next one if you’re using work item links.
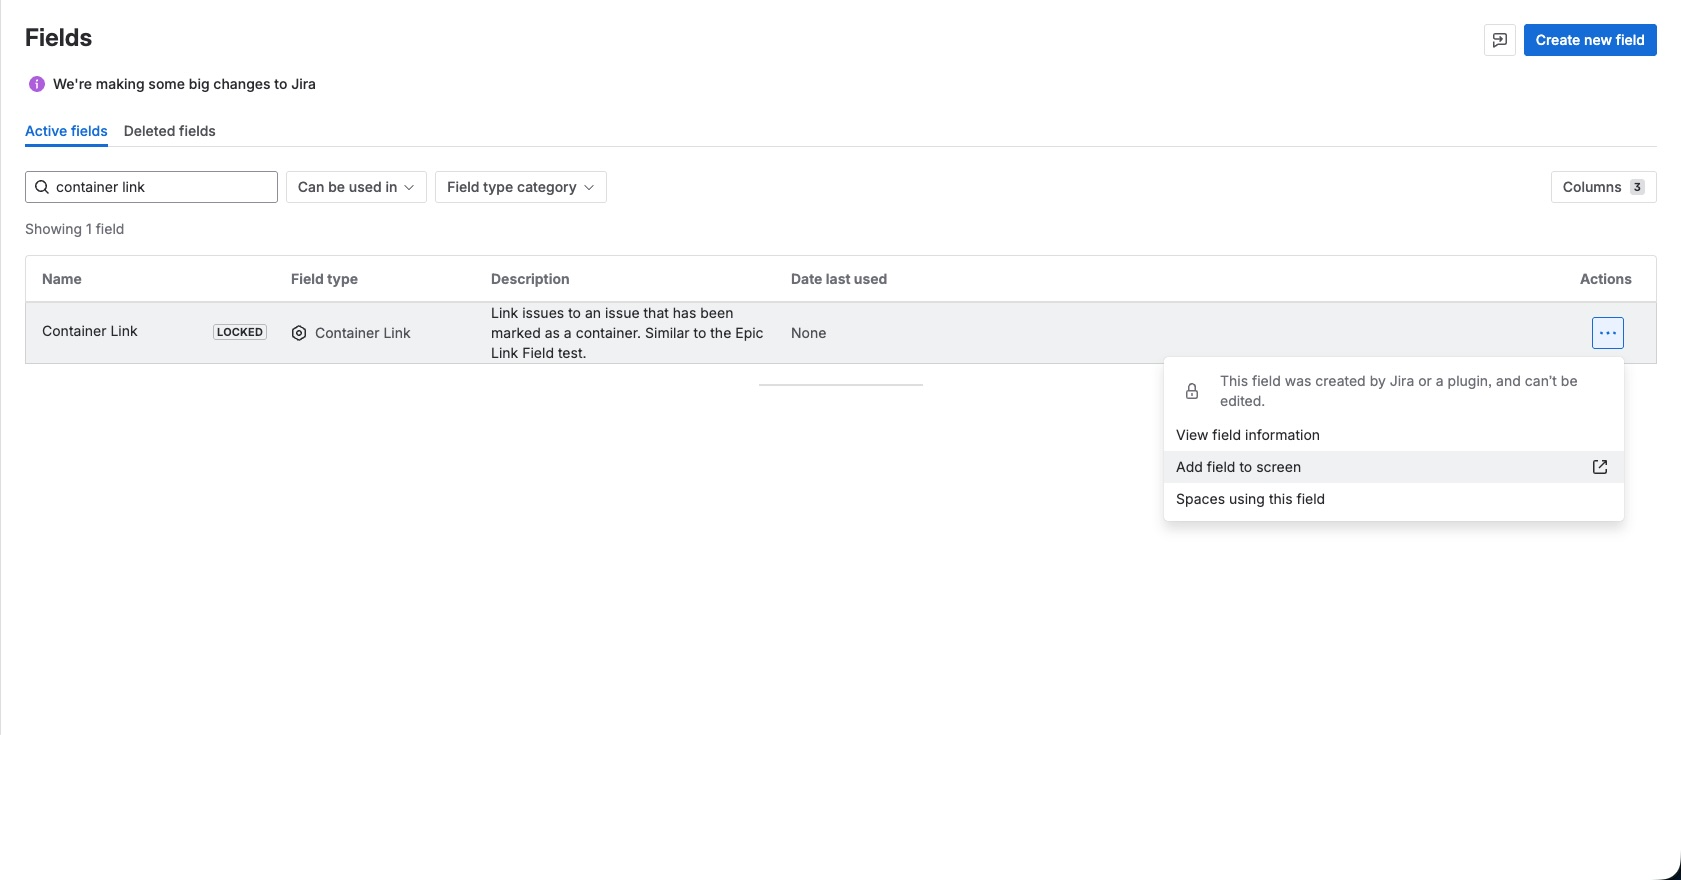
3.Add the container link field to screens
Navigate to the Work items > Fields and type ‘Container link’ into the search bar. Click on the three point menu on the right side and add the field to all screens you need.
And you’re done. Users can now use containers. All remaining steps are only for those who want to use work item links.
3.Create link types
Navigate to the Work items > Work item features > Work item linking to create a work item link type to use for linking containers.
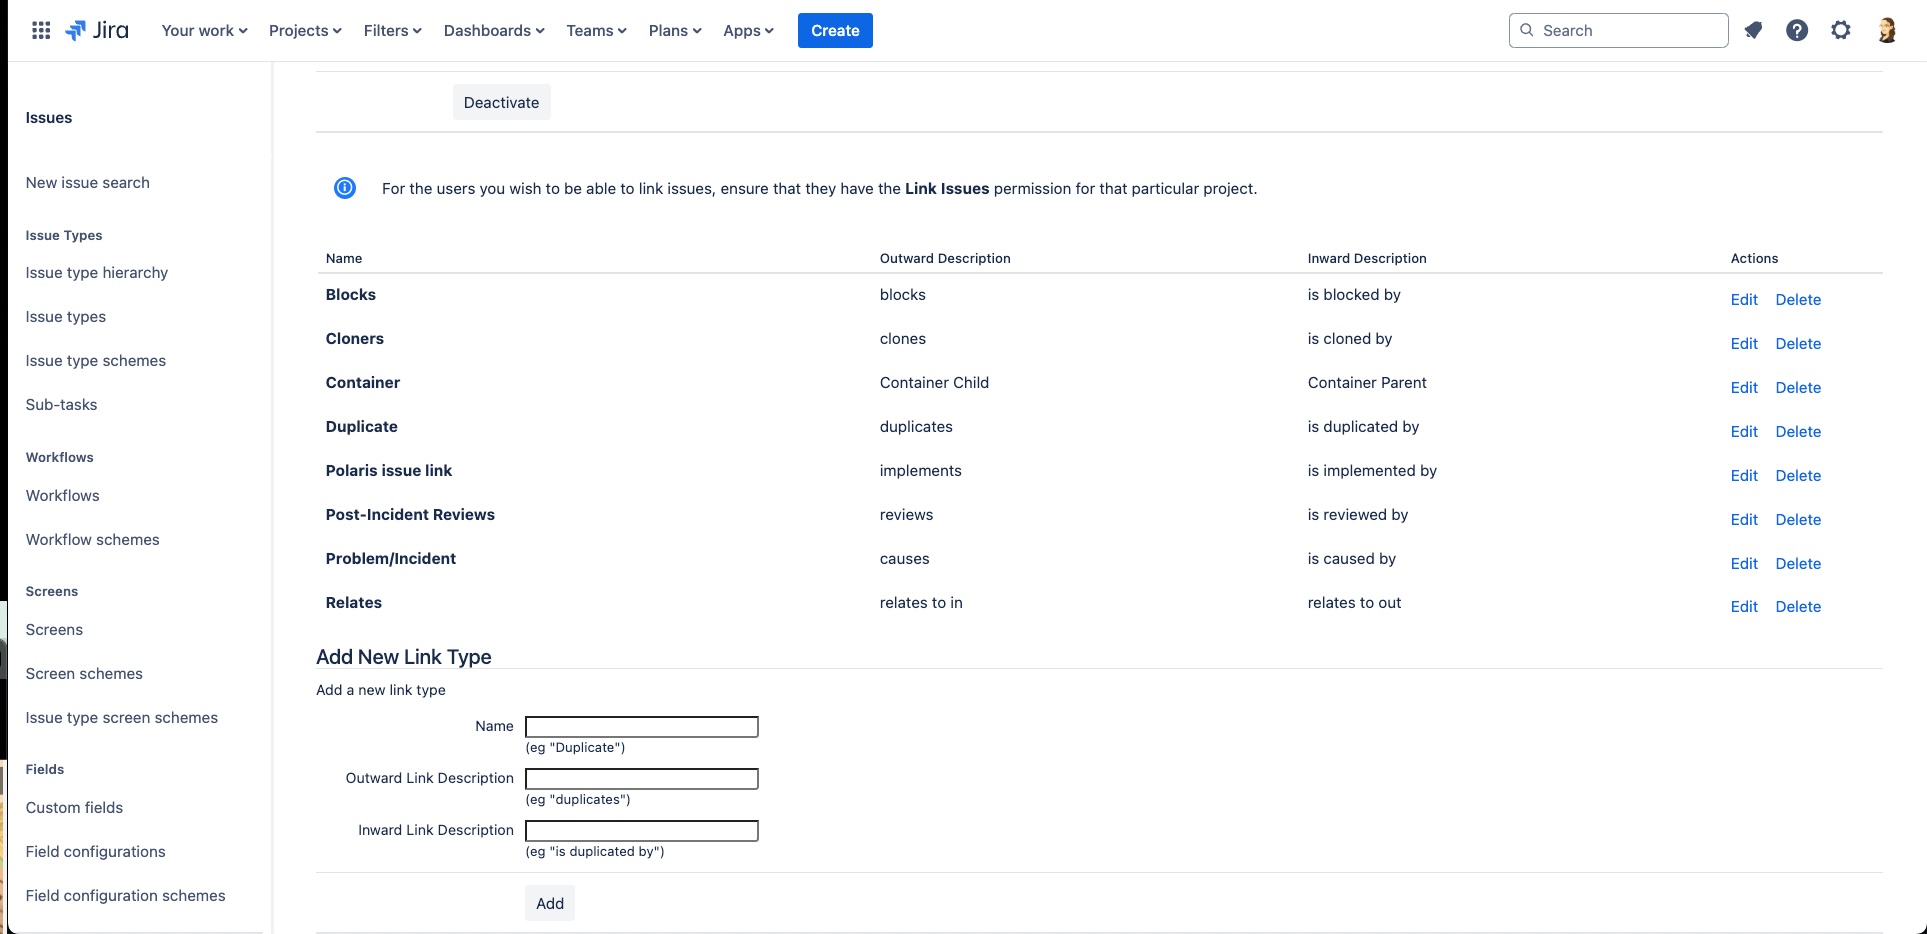
4.Select link types
You can choose which link type or types users should use to create container structures.
Let’s take a look at how users can use this, using the example links: Container Parent and Container Child.

The link name refers to what the linked issue is in relation to the issue you are viewing. So if you are using the container parent link, the linked issue will become a parent of the issue you are viewing. And if you are using the container child link, the linked issue will become the child of the issue you are viewing.
You can also switch the direction of the links to have it the other way around. Or allow users to use multiple types of links.
Which link types are used for building containers is currently only viewable in the global configuration. As users can’t access this configuration, it is up to the administrator to let users know which link types to use. We are currently working on implementing a solution for users.
Permissions
Administrators can limit feature access to specific groups. These restricted permissions include:
Summary Panel access
Timesheet access
Delete key in Detail View Editor
General Detail View Editor edit permission
Bulk edit permission
Dashboard gadget edit permission
